Thursday, December 29, 2011

Can you help me design our Magnetic Command Center?

Submissions needed, advice appreciated, and constructive criticism welcome :) Linking to OrgJunkie where the mavens of organization lurk!

This is our magnetic wall currently.Note that I've already taken the first steps and have a custom made week-by-week calendar (it looks like one piece, but each week is a seperate strip), to do list, and menu boards; mesh containers for the PECS I need to integrate (already have magnets on them) and for dry erase markers; and a shopping list (currently sheets of paper, but this may dissappear entirely as I continue to use Cozi to keep track of such things now).


Still lots of usable space that I need to organize. 
What I know I need ideas for:

  1. Separating paper for each child's schoolwork (since the FridgeFile went out of business and I cannot sew, I've no idea what to use) - 3 children
  2. Some type of removable magnetic boards that are safe for children to handle, and that are themselves magnetic - to apply our PECS to for chore charts and routines. Also needed for 3 children. (Thinking, maybe, to do the files on one side and pecs on the other?) 
  3. Some nice magnets to put up important upcoming school papers/event reminders - I don't really like the thin, or ceramic, ones we have. 
  4. There is a long desk (8 feet) below this wall center. I want to keep most of it clear so the older children can use their laptops or books to study at supervised. But I think something to hold pens and supplies and such sitting in the middle would be a good idea.
  5. There are 3 drawers under the desk in the middle, one for each child, as well. Drawer organizers? They are not large enough for papers, only smaller supplies or objects.
And of course, I'm interested in anything I haven't thought of. I saw some magnetic frames that I love the idea of, and may try that out for showing some artwork, etc along the top.

I don't want it to be too crammed with stuff so that it appears nice and clean, but I want to make as much use of it as possible to be as functional as possible.

To an extent, price is not an object - I'm more concerned with making it beautiful and functional than just functional - I'd like to stay away from white plastic and the like and opt for more beautiful possibilities. On the flipside, there is, somewhere, an upper limit to the budget for this. The calendar was fairly expensive but I think an excellent investment at $60 including shipping from Etsy. I loved being able to choose my own size, colors, font, and the number of weekly strips - along with the matching to do and menu boards.

Sunday, December 11, 2011

Things are coming along!

It's been awhile since I updated - I know how busy I am if I can't find a few minutes to update the blog or link it to OrgJunkie!

The kitchen cabinets and granite have been installed, and they are GORGEOUS. Here are some pictures!


We went to ceiling height cabinets which ggave us a LOT more space; the corners are now accessible, also giving additional space; the bar was cut down by 6" (it was a very odd height) and paneled to match the cabinetry; and we gained more cabinets above the pass through bar and over the fridge (not pictured). We also added a bookshelf onto the end that you can see here for my cookbooks, recipe binders, index card holder, etc. I will probably re-home my coupon items here as well when I can find a pretty and accessible storage solution since I tend to sort them at the kitchen table.


Interior view - lots of custom items here! In the very middle, bottom drawer - that was custom created to hold my crockpot so I can get it out easily. The drawer above that is sized to hold DH's waffle makers (also used frequently). The slot not filled in on the left is for a pull-out butcher block. Not pictured to the right of the stove is a vertical cabinet to hold all my cookie sheets out of the way (I plan to replace the stove with one that has a warmer drawer, in stainless steel).

My pride and joy! This is our custom designed workstation! These are not bookcases, but cabinets - the doors have not yet been installed. There is a drawer for each of the kids in the middle of the desk area, TONS of storage, and an entire SHEET of sheet metal for magnetic organizing! I've already ordered a huge magnetic custom week-by-week calendar on Etsy to match our decor. I will post pics of the filled cabinets later to show just how much they hold!

Not the best shot in the world, but it will have to do - a closeup of our chosen granite and woodstain :) I love how the color of the stain is actually part of the stone! We could not have had something *made* that matched this well! I'm so proud of myself for picking this out, can you tell?

Last highlight so far - my new sink and fixture. That's the Moen faucet I've always dreamed of - pull out, button to spray, and a single dish extra deep sink that I can wash my biggest roaster or cookie sheets in! I sparkly heart it - and the matching soap dispenser on the right too! As you can tel, we still need to pick out tile, which I have to make room in our busy schedule for very, very shortly.


Tuesday, November 15, 2011

Still sick

I went back to the doctor yesterday to follow up on my ER visit/hospital admittance.

I've gained about twenty pounds in the last month as my diuretics are no longer working well (I'm swollen with a lot of edema). Coupled with being low on potassium at the hospital, he upped one of mine and kept me at the same dose of my other one. This has not been helped with the clearing out of the kitchen and the eating of lots of high sodium foods (lunchmeat, canned tuna etc) or fast food. I'm going to try to choose salads when we do fast food; I am well aware they are still not great, but if I stick with the "side salad" type without cheese or meat and use low cal dressing they are not too bad. For sandwiches I'm switching over to low sodium peanut butter for awhile. Bananas are now breakfast every day (potassium, but not TOO much). Once the kitchen is totally done I will be resuming a "whole foods" diet that was previously helping. It's really impossible to do with no kitchen at all. While I do have fridge access, I don't have dishes/pots/etc to cook items in or wash them in at the moment.

For the tachycardia and panic attacks he has added Buspar to my Klonopin. He doesn't want to change me up too much all at once, but when I return in January I will be starting a beta blocker. At that point we will also do another contrast CT to check out this adrenal "nodule" that showed in the hospital to see if it has grown. I will also do another 24hr urine test to see what my adrenaline levels are at again.

I am a smoker, and he pointed out I've now been one for 20 years. Even though I am only 33, that is part of why I'm starting to have issues not usually seen till one is in the 40-45yo range.  I do know how badly I need to quit, so I will be trying a new round of Chantix in January. (My doc is smart enough not to suggest a quitting attempt during the renovation and holiday season, LOL). He did suggest I cut down as much as possible and try doing crafts or other things to occupy my hands when I can until January. Each cigarette I don't smoke right now will help me feel a little better.

And then I came home and this morning woke up to blowing and hacking up green mucus. Ew. And VERY painful. I'm going to give it 48 hours to see if it goes away (color change does not always mean infection) or gets better, and if not I will call him and probably be put back on antibiotics and steroids.

So.. hopefully I am better soon.


The Waiting Game

In some ways there has been a lot going on in the past week; in other ways there has been very little going on.

My Week #45 for OrgJunkie is apparently a lesson in waiting instead of decluttering. We're making some decisions that are not only very costly, but that we will be living with for a very long time. Everything requires a lot of thought and reflection and discussion instead of simple, quick decisions.

The kitchen has been delayed until either the beginning of next week for the cabinets only, then the granite install after Thanksgiving; or the entire thing being delayed until the first week in December. I didn't realize while I was so sick that I needed to okay the stain samples the builder had done, or that I needed to pick out the actual slab of granite that would be used - I thought I just told them color names and they picked it up. Oops!!

I'm scared of some of the decisions I've made, and there are a couple of things where it seems like there isn't an option for what I want. This is approximately the color scheme we first wanted, dark wood with light granite:


I didn't want a lot of wood grain, but the wood they used has a lot of grain in it (maple). To have less, we would be going to a softer wood like pine - and we already said no pine as we've had furniture pieces made of it before and it nicks and dents too easily. Other woods that had less grain but were hardwoods are completely out of our budget. Also, we nixed the dark wood color due to a lack of natural lighting within the room and not wanting "the cave effect". So then we were looking at a color scheme more like this:


I originally went wanting a granite that was a lighter color with a lot of quartz or reflective bits in it and black veining. I did locate one and liked it, and then saw a very unusual slab of black that had not only reflective bits but almost pieces of what looked very similar to the wood color we chose (it really does look like wood chips in it!). I felt very drawn to it at the time and decided on it because it was so unique. Now, I'm scared that I didn't go with what I decided on ahead of time and found. I'm so nervous. Granite is expensive - if I choose something we end up not liking, we are stuck with it for practically forever.

So now we're at this color scheme:
It's the exact opposite of where we started out. I hope I have not chosen badly :( We are adding under cabinet lighting to keep the granite very reflective and increase the light in the room without adding too much to the electric bill (they will be LED). We are going from a single pendant over our sink which was already offcenter to a strip of 3 pendants that can be moved down and centered exactly over the sink and provide more light there and on the bar.

Another large consideration is the floor. The kitchen quote came in right under $20k and that means we have no budget whatsoever left for flooring. We have this awful, horrible black tile that never looks clean (I've ranted about it before) that we wanted to go over with laminate wood. We are stuck with the black tile for now, which was one of the reasons I went with the black granite; it will look good with the tile, and later when we DO get the laminate, the wood tones in it will also go well with the laminate.

Still very anxious about how it's all going to look.

Saturday, November 5, 2011

I haz a plan

I have many, many things that have to be done this week. I am working on listing them out and making them work, as I'm still resting and in pretty bad shape.

Tomorrow (Saturday) - sit and help the older kids with their Science Fair research during the day. All kids may be able to go over to neighbor's to play in the afternoon. SIL and BIL are stopping by to pick up the party supplies that they left in the garage, and I may tangle BIL into helping move the hutch with neighbor's husband to neighbor's house (who wants the hutch). And then I shall possibly nap, or watch Hulu and chill out.

Sunday - DH is off work as usual. Will lift and move as little as possible while helping him clear out the kitchen. Have a very painful decision to make; I have a border of coffee mugs on the tops of the old cabinets, and the new cabinets are going to the ceiling. They are cheap mugs and normally I wouldn't think a thing of just tossing them, they were there to fill space - but my mother gave me most of them, hunted them down at the Dollar Store for me, and she passed away in June. I don't know if I can let go of them yet, and the thought of them boxed up or gathering dust where I can't see them either literally has me in tears. I don't want to be attached to
"stuff", but this particular thing is huge to me as it's kind of the housewarming gift she gave us, that I picked out, and there's not much else of her in my home to remember her by.

Kitchen must be 90% cleared out, all dishes done and out of the dishwasher etc Sunday night. While DH attacks that with the kids, I will be working on the paperwork for the girls' IEP meetings Monday and getting organized so that I'm not caught flat footed and have what I need to get what they need done.

Monday - The IEP meetings are at 9am and 10am. There is no way they will take only an hour; I already foresee adjournment. There is too much the school is not doing that they should and are in violation, and in other ways there are many changes that need to be made to the existing docs, for which I have documentation and am prepared to argue. DD1 is 11 and will be sitting in on her IEP for the first time so she can speak about what she needs. We will see how it goes. I hope well, but I suspect "not well".

Then we journey to Lowe's or similar to get new non-louvered doors for the pantry (ugh, hate them!) and a new microwave, because they are going to custom frame in the microwave to look nice. I hope to find some sort of deal but for stainless I know it's not going to be cheap.

Kitchen must be totally empty that night, and the kids have karate. Trying to figure out where to set up a peanut butter/tuna fish sandwich station somewhere else in the house with some dry snacks and bottled water for packed lunches and snacks. Have some disposable stuff, need to get disposable coffee cups and plates.

Tuesday - the kitchen crew may or may not arrive. It depends on when the cabinets are done (they are being made offsite). They will be here Tuesday, Wed, or Thurs - but WE must be ready by Tuesday in case they are ready to go. Ripout should take one day, maybe two but they really think one. Reform will take one day. Cabinet placement one to two days, and then it's a week's wait for the granite installer after he gets the final exact measurements. I don't know if the backsplash goes in before or after the granite, no clue. then paint touchups and such and it'll be DONE hallelulah!

Outside of the kitchen going on, it should be a "normal" week going on around that. I need to make it up to the storage place at some point during the week and arrange to go down from a 10x10 unit to a 5x5 unit; we'll be moving the few things left in the 10x10 to the new 5x5 and then taking the Halloween boxes from the garage to the new 5x5 and filling it up. Then that will be done, and has accomplished cutting that bill in half (we gave away a lot of stuff out of the 10x10) AND as of tonight the outdoor storage shed is no longer storing Halloween crap. Yay. DH is very happy about this, and so am I. Some things remain to go out there that he will work on during the week such as the pool chemicals going from the garage to the building, and such. Eventually, that will have the GARAGE all cleaned up. Again. And three things will get marked off my OrgJunkie weekly challenges :) Woot woot!

Wednesday, November 2, 2011

When Everything Happens At Once

Or at least, it seems that way.

Last Thursday, I went to the Emergency Room as the bronchitis I've been fighting for over five weeks became just unmanageable. I couldn't get my breathing under control, and was experiencing some pretty scary stuff. DH was on his week of vacation and I already felt horrible for "ruining" it - this was supposed to be a fun time of decorating and getting ready for our Annual Halloween Hijinx party! I'll skip the gory details, but after a contrast CT, I was sent home with a dx of pnuemonia, and scripts for an inhaler and more antibiotics.

Friday evening, friends came over to help do party prep. I am eternally grateful to my co-hosts for that night as they slaved over the Jello shots and DH worked on food. I made the pumpkin bread cake. It looked like this, if I hadn't been feeling so bad.


Mine looked a lot crappier. It mimicked how I felt. We had a sick pumpkin bread cake. At least it was tasty, even if it wasn't as pretty as the one above.

Saturday night came along, and the party with it. I'm told everyone had a blast. I sat outside in the cool air trying to breathe, my spendy custom costume gone to waste, my makeup about the same as the Sick Pumpkin Cake instead of what I'd envisioned. I told my guests goodnight and went upstairs about 11pm, the last partygoers were kicked out around 3am when I told DH I needed to go back to the Emergency Room.

I was running a fever of 105.4. I've NEVER run a high fever before, and I hope never to again. I was in so much pain. At the ER, I thought all was well, my Xrays were clean, they said my lungs looked good, the on call doc wrote me a scrip for painkillers, cough, and a different antibiotic. My temp was down - WAY down to 95.8. And then.. the discharging nurse noticed that my O2 was hitting the 80's when I dozed off. There was so much crap in my lower lungs that my autonomous breathing wasn't giving me enough oxygen without me forcing deeper breaths while I was awake and in pain. I was admitted. 

Admittance brought more pain - lots of needle sticks. We'll again skip the gory parts. The good part was - MORPHINE! Yay, not so much pain. The bad part was... well, everything else including the food. DH made sure I could have caffeine and sugar and brought me the most delicious Starbucks I've ever had. It was sooo good. And made me hack and cough and yanno because it was hot and relaxing.

I came home Monday afternoon - almost against medical advice, but they agreed to discharge me. However, no narcotics. This was going to suck, but I was going to be here for the kids' Halloween. I've never missed one yet, dammit.


So I'm on a ton of meds, but I'm home. On bedrest, and with a ton of decorations to take down.

Did I mention that next Monday we have both our daughters' first IEP/ARD meetings at the new school? And then on Tuesday, our kitchen starts getting ripped out and has to be completely empty?

*Deep breath* 

*hack wheeze gasp*

One day at a time. That's the only way we're gonna make it through this right now. Oh, and the kids are doing science projects, too. So. Much. Fun. *screams*

Bless my littlest Batgirl, who told me to put on my big girl panties and deal with it.


backlinking to OrgJunkie

Saturday, October 22, 2011

Week #42 - Closet seasonal swap out

Linking up with OrgJunkie again :)

Today, I switched my daughters' closets over from summer to fall/winter. This involved several changes. They are now in a school with a uniform, so they are not in need of as many clothes; both of them are in the same size now as they were last year; and I wanted to update the storage pieces in their closets as well.


First, we swapped sides so there wasn't as much hanging room. The dressers are now apart from each other on the long side (explanation follows in a few paragraphs).

My first daughter's closet is very large, and needed 7 13" bins to go across one long shelf on the right hand side of her closet. We chose 4 pink bins and 3 black bins (she has a black and pink 6 section hanging organizer to hold her uniforms and make the mornings easier, so we were matching that). We got all of her things packed away for next spring/summer into the new bins, 5 of them instead of the previous 7. We used the remaining two bins to hold her extra backpacks, shoes, and purses.

We purged 1 large bag of trash (stained and ripped clothing, outright trash, tags, broken jewelry, broken purse strap purses, etc). We also purged 4 garbage bags of winter clothing that will be garage sale-d in the next couple of weeks and only kept her favorite winter dresses and comfy play clothing. We also majorly purged down her shoes and got rid of the shoe organizers underneath her hanging clothing; she has 2 pair of dress shoes (black and navy), one pair of school sneakers, one pair of gym sneakers, and 6 pairs of boots that now occupy the same space. 

The final thing we did  was to clear out her drawers to pack away swimsuits, shorts sets, mismatched socks, and outgrown items. She now has a few empty drawers and several minimally filled ones. The dressers in question are placed on either side of the longest wall with no clothes hanging on that wall; for Christmas, DH plans to build her a vanity between the two so that she will have a private space for doing her hair and makeup instead of the bathroom shared by three children in the mornings!

I chose these bins from The Container Store as they are being discontinued (Middle row, for size).


Then I did younger daughter's closet. She is also in the same size this winter as she was last and has uniforms, so we did the same type of purging. We drastically reduced her shoes, however, as she has AFO's now to correct her toe walking/over pronation and most shoes do not fit over the orthotics. I plan to use her now mostly empty shoe organizer on the back of her door to hold socks and tights for quick reference/matching.

Her closet is much smaller, at 39.5" across with 2 usable sides. So she got 6 pink cubes -2 for dresses, 1 for shorts sets, 1 for the rest of her nursery bedding set (I keep having items made to match including a twin quilt most recently), 1 for backpacks and purses and 1 for shoes (in hopes she is out of the AFO's by next spring *crossing fingers* it will have been over a year and many of the shoes are still too big for her natural foot size..). I removed the shelf we had set across the other two to make a "U" shape to hold more when she was an infant, and when I say we purged, I mean we PURGED!

Before:
(the other side had TWO rods...)

There were 2 bags of trashed clothing, 2 bags for donation, and 8 bags for selling! Wow! That was from our winter stash and from what we let go of from spring/summer. I think an entire bag was shoes.. I had a bit of an addiction there :X

I need to do my son's closet, but they were all sold out of the blue bins and so I am on the hunt for what I want to use in his closet. He is unlikely to change sizes anytime soon (men's size large for over a year now; previous to that a men's medium/youth xxl for 3 years) so there is not much purging to be done. I actually need to purchase him some sweaters and long sleeve shirts as the ones from last year were too small.

I am actually a recovering kids clothing addict, so this was a HUGE step for me - the first step is that over the past year, I've only bought what I *loved*, and purchased maybe 1/50th of what I had in years past. Yay! All that money saved allowed us to make lots of changes and upgrades to the house and to our activity budget, which was very nice as well. I still have my "bad moments" of giving in and coming home with several shopping bags - but I am no longer reticent about returning 95% and only keeping a couple of things that I love - or not keeping anything at all if we didn't love it.

How do you organize your children's clothing? I base mine on the fact that I now do laundry only twice a week - sheets, playclothes, pajamas and towels on Wednesday, and all uniforms (husband's and children's) on Friday nights. My magic number for any given thing is thus 14 (in case I'm sick or we take a trip and need 2 weeks worth of clothing).


Friday, October 14, 2011

Kitchen Renovation Step Two: The Estimate

Yep, the estimate is in!


Good news - it is well under what I feared it would be, and we're able to include the little extras we wanted (a bookshelf, wine rack, crown moulding, under cabinet lighting, and GRANITE countertops! YAY!)

Bad news - it will be happening sometime between Halloween and Thanksgiving, which is already a very busy time of year for us. We are being told it will take one day for rip out, one to two days to place the new cabinets and fix everything up, and then five days past that for the countertops to be finished. Ugh. I can't wait for it to be done, but that's going to be a tough week with no sink and no prep space except the kitchen table! Peanut butter sandwiches it will be!

I still have to give the final okay to the samples they are making up (we chose oak wood with a maple stain vs a patina stain), and choose the granite. They will be starting on the construction of the cabinets off-site as soon as possible, however.

I must also choose what sink I want (undermount, single bowl stainless..but have to pick which exact model); water fixture; and the new stainless microwave (since they'll be taking the old one down, it will be the best time to put the new one up so they can frame it in if needed).

I am SO excited! We're going to refinish an inherited kitchen table that fits our space much better (has 2 leaves vs 1) to match the cabinets as close as possible (it's a maple wood, so the stain will look a little different). If possible I may ask them to do this to both save our time and because our level of expertise is nill next to theirs.

Will update with Step Three: Final Decisions when the verdict is in!

Second Stage of Kitchen Renovation: Pantry

Linking up to OrgJunkie as usual, this was our project this week (and it's COMPLETE!)

The Container Store has been having a 25% off sale on their ELFA systems for some time (and hurry if you want to buy; it ends this Sunday, October 16th. Drawers for the system will be going on sale starting 12/24 so hold out on those! *wink*)

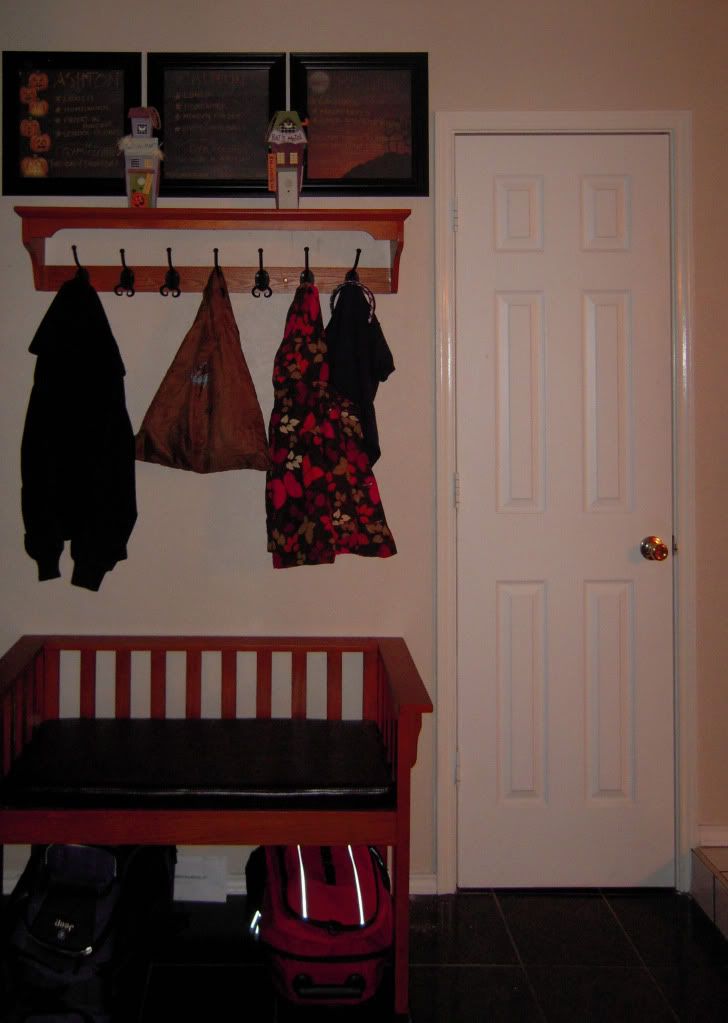
I apologize for the quality of my pictures, and lack of before pictures - my camera battery again wasn't charged (need to invest in a 2nd battery) so I just used my ubercrappy 3G no-flash iPhone to snap a couple of shots.

We have a pantry that is reach in only. There are bifold doors which open, and the interior measurements were 55" across and 22" deep. I know that is larger than many pantries some families have access to, but since I cannot use the back sides of the doors (and can't go to different than bifold without running into the kitchen table) this presented some unique challenges for us and made it the smallest pantry we've ever had, including in our first college apartment.

We did the platinum finish (to eventually match our stainless steel appliances), and painted the interior of the pantry to match the kitchen (kind of a cafe au lait color). For a little under $300, we got 4 supports (one spaced oddly, and extra, but will allow us to add drawers later if we wish), one 12" deep shelf, and four 16" deep shelves as well as the brackets and other items required for installation.

On the very top shelf we had to go narrow as it's above the door opening and we must reach above and around the second-to-top shelf to reach it. I chose to use containers that had handles on them so I can easily pull them down when I need them.

They were around $4 at Walmart when I first got them years ago. I freshly washed each of them and gave them all new, extra large font labels (sorry, blurry in the pic but not IRL). These hold castor sugar, brown sugar, granulated sugar, coffee creamer, pancake mix, steel oats, dried fruit (to add to oatmeal), and flour. To the right of these canisters are containers with built in handles; a large gallon of vegetable oil, a large container of soy sauce, and a large container of syrup.

The second shelf down holds steel mesh bins but will be changing the contents of these bins into some matching mesh DVD holders that the Container Store also has on sale (they are large enough to hold tuna packets, kraft dinner boxes, and other things using the space more wisely). Then I will be using these bins to hold taller, lighter objects such as chips and also heavier items that need to breathe like root vegetables.

Here is the best picture I could get of the entire pantry assembled:

Next shelf down holds 3 larger style containers, same as the top ones, in which we hold cereal and granola (I'm a coupon shopper, and each of these babies holds about 6 boxes of Cheerios!). The Bread Box is next to that and while I don't have any right now, I'll be adding a basket on top of it to hold bread mixes. The empty space next to it will be holding the stackable mesh DVD holders I mentioned above for boxed dinner mixes.

Then follow the cans. I was actually really upset that I had to reuse my "ugly" white extra wide can holders, as I wanted to match the stainless look. All of the metal ones available are not wide enough for cans, only for spices. Darn you, Container Store! That's okay, as you can see at the bottom, my bulk bins are also white. My lovely husband has it in mind to experiment with the Krylon for plastic spray paint in a silver or grey finish on these white objects ;) The surfaces won't come in direct contact with food, the bulks are individuals like Capri Suns, dried fruit packets, applesauce containers, etc. I'm still considering if we will "go that far" or just deal with the white.

The second to last shelf - you can't see all the way to the right hand side of the pantry - holds 5 packs of bottled water where previously my 12" deep shelf could only hold 3. That's almost doubling my space right there! Yay!

If we do decide to add a couple of drawers, we will move up the canned shelf a few notches and do it under that shelf, above the water.

I'm so happy with how this turned out. The "old" pantry had a lot of wasted space, lots of badly used organizers (like the baskets that "hook" onto the shelves and then leave a not stable thing on top of the shelf you can't set anything on), irregular shaped baskets and general bleh. The walls were badly stained and so were the bowing particle board shelves from the previous occupants. We have been "fighting" this pantry for over five years... and enough was enough! Who knew we could knock it out in one day? :)

We need to wait for our next paycheck, but we also plan to replace the louvered doors with solid six paneled types that match our interior and exterior doors. I don't know why these were ever put on there, and they are impossible to keep clean and several of the "sticks" have been chipped over the years due to catching on things and people.

Saturday, October 8, 2011

A long journey of transformation for DD1's room

They grow up so quickly, don't they? *sigh* (PS..does anyone know how to put photos next to each other so they are not all stacked? This is driving me nuts.) Linking to OrgJunkie as this project was my 38th and 39th weeks in the 52 weeks of Organization challenge - week 38 was repainting above her chair rail; week 39 was rearranging her furniture and changing some accessories out.

We moved into this house about six years ago. In that time, we've had her original room setup (where we had just moved in), her initial redo a year later for furniture that fit the room and held her things properly, and then this past year we redid things as an 11 year old wants things far different than a 7 year old does.

From move in until right before the first change:


Everything had a place, but it was driving me nuts. None of the furniture matched as it was gathered as cheaply as possible (we had a very small budget at that point); there were 2 sets of name letters as she couldn't decide if she wanted to go with lighter or darker colors (see the 2 shades of curtains as well), and everything had a place but was visually very messy and crowded.

Thanks to the RoomArranger offered by Better Homes and Gardens, and a sale at Penney's on some Pottery Barn Kids - type modular furniture, we decided on this arrangement:

Her bed would change to a daybed with trundle so we didn't have to put the headboard on one wall; she'd gain two nightstands; a large television unit, and a desk with more storage. The table would go in front of the window and move out of the corner. This arrangement worked for a long time. The new room looked like this:


We changed the curtains (Lowe's), added the canopy and door entrance (Hearthsong..already owned the canopy but it kept getting pulled out of the ceiling on the previous bed because she'd roll over on it; the daybed prevented that from happening again!). We went off the green chair covers to her accent color and kept Tinkerbell's bedding for the bottom trundle bed. I covered the pink bins she had on the shelves with pretty Contact Paper for the cubbies, and used the 2 purple ones by her desk. We had cohesion! We had storage! We had prettiness! yay!

And the years went by and she grew older, and her needs changed some more. We decided on a new arrangement of her modular furniture and ditched the table entirely. We made better use of the longer wall in her room, let go of the nightstands (which had become hot spots for junk collection - TOO MANY little drawers), got her a comfy chair to read in, and left the space at the window open for some floor pillows and I'll be getting a big purple rug for the middle of the room for her and her friends to lounge on. This room should now take her through the teen years (I hope!). Please ignore my chop-job on the curtains, I still have to level them out at the window-sill level (had to cut them down from 80" lengths and did a horrible job mis-measuring).


We have not yet decided if the TV is staying since she mostly watches on her laptop, and we have a media room just outside her bedroom that she can watch TV with her friends on. It is potentially going to leave (along with the extra piece of modular stacker) and be replaced with a second fuzzy chair. To give a sense of scale, the dollhouse pictured is over 3 feet high; we had to remove the lower shelf in the spanner to make room for it.

Stuffed animals are still the bane of my existance, but we haven't found a better way of storing them except on top of the desk. She'll be needing this space in the next few years for trophies and things from school events and sports (she's already gotten her gold belt in karate and is nearly to the next level) so I'm not sure where the animals will end up (possibly on the window seat?). We've already gotten rid of over half of them. She also lacks the proper space for storing her books, but we're making do as best as we can with that for now. I may go to baskets for her desk and then organize the books within them by genre or series and that way we can use the full depth of the shelves as well to store more. 

So it was a long and expensive journey, but I think we did well with it! Everything was done for under $1500 including all the furniture, bedding changes, paint, etc. The last re-set only ran about $200 for paint and supplies, bedding, and the blue chair and a few accessories. Yay for clearance!

Monday, September 26, 2011

The Master Bathroom

I'm declaring this "done" for the decorating and organization process; I've met those goals on my OrgJunkie project list. We still intend to replace the vanity and countertops because they are damaged, and the shower needs retiled also due to damage (the home we purchased was a pre-foreclosure and while we've fixed lots, a lot remains that needs to be fixed.)

I also intend to add artwork to the walls, but art is very personal to me so that will happen very slowly over time. In 5 years I've only found the one picture I wanted to put in there (and still haven't painted the frame, haha).

Before:

After (same view)
Hanging screen courtesy of The Container Store,  4 panels per pack at $10. I ordered some black ones of a different design for my Master Bedroom project (backordered, not in stock yet). These also make an appearance in our Media Room in a different manner. The panels are plastic so easily cleaned and no problem using them in a humid environment like the bathroom. I wanted a little privacy as the bathroom door, and view of the tub, are in a direct line with the bed in our bedroom.

Alternate view of the bathtub area:

What I dislike about the window is that it doesn't open. It's functionally useless. At a later point I will replace the blinds with 2" white plastic ones. You can see here a little better the different color that I have used for the walls. The cheap wooden frame on the painting I intend to paint in the off-white color of the tub and trim. 

 This is the vanity that needs to go. That's not an optical illusion on the righthand side; the unit actually dips down badly and the door isn't hung square. The lack of drawer space is killer. Under my sink are my hair products that I use frequently (right side basket, no pic) and teeth supplies (mouthwash, replacement brush heads, toothpaste etc in the left basket, no pic) on either side of the plumbing. On the tall side the cabinet holds my husband's Axe collection - I am a "coupon queen" and since he loves this brand/particular scent I stock up whenever I can. We've limited the space given for this to that one single cabinet, which is full of body spray, body wash, and deoderant (no pic). I'm sure he has a year's supply at this point!


This tower is something I'd like to replace, but I'm not yet sure with what. The top bin holds miscellaneous things like sunscreen, sunburn lotion, and washcloths; second bin holds my hairdryer, hair styler, and a huge selection of Curlformers (which are awesome); the large open section holds our towels, the next bin down holds my huge collection of nail polish and related nail care products (these are shared between me and my two daughters); the final bin at the bottom holds first aid supplies like larger bandages and wraps, splints, and such.

I just carry the green basket over to the sink area when I want to do my makeup. It holds my train case, roll of brushes, and various other makeup. I need just a larger train case, but haven't yet found one that I like and can afford. I have an addiction to Benefit and Tokidoki and while the Benefit fits well in this case (especially the mini's I love for travel), Tokidoki was definitely not created with storage in mind! My hairbrush and favorite couple of clips and headbands are also in the green box.


This is a four drawer dresser - the top holds medicines; the second drawer holds small containers of hairbands for DH, my face cleaning products (eye in one, face in a second), DH's facial care products; third drawer holds my makeup overruns (a company I loved, Aromaleigh, went out of business and I stocked up. It's minerals so will never go bad, and I don't intend to get rid of any of it - it's not replaceable. It will, over the next few years, get used up) and feminine products and extra TP rolls; the bottom drawer holds razors and shaving cream.


Anyone have suggestions on what to do for storage replacement? The kids bathroom only holds extra shampoo in terms of stockpiling; my closet has shelves at the entrance that hold hair dye overstocks - I'd love to get these centralized with the rest of "the stuff". A different vanity will help a lot, but won't hold everything. I've considered the "ladder style" shelving where the current dresser is with pretty baskets, each one defining the limits of the "stockpile" of that particular item. I'd love some alternative suggestions, though.

Ones that don't require "get rid of X" - these things will ultimately get used up and are used on a daily or weekly basis. I have dramatically slowed my stockpiling and imposed limits on it, and some things (like the Aromaleigh) will eventually dissappear entirely.


Also, I do not like unconcealed storage for these types of supplies, so no hanging shoe organizers of items or the like. I'd love to hang my hairdryer and such on my vanity door, but the current vanity doesn't allow that (the wood is only 1/16th" thick to hang from O.o) - although maybe Command Hooks would work?


Friday, September 23, 2011

First stage of kitchen renovation: Measurement

Today I met with our contractors to start the kitchen renovation process. I've already spent the past few months researching the materials, style, functional assessment of the existing kitchen, and such on my own. I'm pretty sure DH is sick of it, and they haven't even started yet! Heh.

Measuring was the word of the day. We discussed many options. This is going to be a complete rip out of the existing cabinetry; custom built cabinets and installation; possible upgrade options that will be decided on dependent on cost; and last but not least, we may have to replace most of the downstairs tile floor as they are unsure it will be undamaged by the ripout (we do not have any extra tiles, and are not the first owners of the home that chose it). I will be getting an estimate on the flooring after the estimate for the cabinetry comes back to see the overall budget we are looking at.

I was pleased that we seemed to be very in tune balancing their suggestions for what they've seen be successful or functional, and my desires and needs. We are definitely incorporating some unusual elements based on my grandmother's old-style custom kitchen - a pull out chopping block above the tableware drawer, and a cookie sheet "slot" cabinet next to the stove. These can be incorporated pretty inexpensively. Other things may get the axe because of cost, but are being included in the estimate because of Style, such as a wine rack above the fridge instead of a plain cabinet, or extending a pretty nonfunctional workspace to the left of my sink to hold a bookshelf where that end sticks out into the eating area. I would love the additional counter space and shelving, but again, that will depend on cost, after I see what the flooring will be to replace.

Next step will be Decisions when the estimates come in. I'm excited, but anxious - we've never done such a large project before, ever. I'm very nervous about the expense, the time we'll be without a kitchen at all, the cleanup, and hoping everything looks the way I'm envisioning it and that I don't make some silly expensive mistake on a choice like stain color!

Have you redone your kitchen? Did you encounter any unforeseen issues, or make helpful and interesting alternative plans you whipped up for "odd" areas or spaces?


Tuesday, September 20, 2011

The Binders of Doom


Each teacher requires a certain set of things for their class. Four require binders, six require folders, five require notebooks, two require a journal, and miscellaneous writing utensils and such. It's been really difficult for the kids to keep up with, so I invented The Binders of Doom.


Remember to keep it easy.
  1. It has to meet the requirements of the teacher and class.
  2. It needs to hold everything that class needs, or as much as possible.
  3. If you can afford to, I highly recommend these for each desired subject in the front of each binder: Quick Reference Guides.
  4. It should Come With Its Own Instructions built in.
The binders the teachers require are 2". I bought 1" - I'm just a rebel. No, honestly there's two reasons for this: one, I'm not spending $12 on a binder times 8; and two, there's just not that much room in their backpack or in their lockers. The system should hold up for a semester, and then I will archive things over the winter break with binder clips or paper clips and store them in one single 2" binder per child at home (which at the end of the year will hold everything and join our Reference Library at home).

I found these at Staples on clearance for around $2 (they are more expensive online). They met my criteria: the spines have an insert for the subject name; they have a clear pocket on the front; two pockets in the interior; and they use a D-ring format. (If you don't know why to use D-rings, you will eventually find out.)


I used my handy dandy LetraTag because the refills are cheap and I use it on everything (yes really, everything...) to label the spines by subject in extra large font.

Then, the front of the binder I printed full 8.5x11 copy paper sheets I made on WordPad. These are the Built In Instructions. It tells what class it is, what materials to bring to that class, what dividers are in the binder, what to put in the folder, what to do with returned papers and handouts, and what to do with homework. At the bottom is a reminder to bring the Binder of Doom home with them every Friday.
(Every Friday we go through the binder to make sure things are filed correctly - and just because their teachers live to make my life hard (half-joking), some of the handouts aren't hole punched so we have to punch them to get them IN the binder.)


Inside the binder are 5 subject dividers, labeled to match what the Instructions say (and what the teacher requires OR if the teacher didn't provide label names, the best organization I can find for the typical papers in that class.)


In front of the dividers is a 2 pocket vertical poly folder that has holes in it to go in a binder, also from Staples (on clearance for 70 cents in store!). Vertical folders take getting used to, but they work really well; when the binder is closed, papers cannot accidentally fall out the top of the binder if it gets dropped or messed about with. The folder is also labeled with the subject in case they need to take it out and remember where it goes back.


If the subject requires a spiral - do not try to put it on the D-rings! There's a much easier way. Take the front cardboard or poly cover of the spiral, and insert it into the lefthand pocket of the binder interior. It easily opens to take notes and doesn't interfere with the D ring which can use its full 1" capacity this way. This does, however, keep the notebook within the binder, which is one of the "rules" instead of it being loose. If it covers your D ring too much and the binder won't close well, trim the outside edge of the spiral by 1/2" all the way down so it will slide in further, and this should fix your problem. I also label the spiral, like the folder, in case they do need to take it out and replace it.


You can also see that everything is color coded. The folder, spiral, and binder all match, and the same color is used on the Subject on the front of the binder. This carries over to their color coded schedule in their agendas (a post to come later) and is ALWAYS consistent. They know if they pick up something and it's green, it goes with the other green stuff - no exceptions. If the item doesn't come in a color you need, $2 will buy you a sheet of duct tape (indestructible! YES!) in any color you can imagine. I had to do this to one of our spirals as I just could not find - anywhere - a pink one, for some reason.

Recap:

The Binder of Doom holds dividers, a folder, a notebook, instructions, and is color coded - and takes up 1.25" of space total when full to capacity.


Some advanced tips? If you're okay using paper (I got cases of paper super cheap before school started, and used the rewards to get printer ink) - scan in and print notes, handouts, or things you need to "shrink down" - but print them *doublesided*. Instantly, you've halved the space they need. Use the thinnest spiral notebook you can find, and remind your children that they can write on both sides of the lined paper. This goes double for that expensive graph paper *shudder*.

Thanks for checking out our system - and please post if you've made one of your own! There's always room for improvement and sharing ideas can be the best way to do it!


Posting to OrgJunkie.

The Homework Folder


I remember middle school - and high school. I had one 2" inch binder, one pencil pouch in the binder, 5 subject dividers (English, Math, Science, History, Geography), and 1 folder and 1 spiral for each core subject. That was it, and that was the limit of what would fit in your backpack. They were all trashed by the end of the year and replaced each year.

Today's schools are far different - or at least ours is. We have 3 children, but the youngest is in Kindergarten so I'm only addressing our older 2 that are in Middle School (Junior High) in 6th and 8th grades in this post. Each teacher requires their OWN binder, folder, journal, composition book, notebook spiral or some combination thereof. It has been a NIGHTMARE trying to keep the kids organized, and we have had papers everywhere, disappearing homework, forgetting which materials go to which class..

Did I mention both my daughters have autism? Well, that presents its own challenges, so I knew whatever way I found to "Hack the System" to help my kids out had to: work for the teachers, be easy enough for my daughter to use, and be easy to replicate for my older son.


The first thing I invented was: The Homework Folder. This is a basic two pocket poly folder (whenever possible, I've used poly to help things last. It's not the best for the environment, but we started off the school year with paper and they are *already* trashed three weeks into school... so poly it is.)

The front of the folder says Homework and the child's name, grade, and class level. The left side inner pocket is labeled Turn In, and the right side inner pocket is labeled Bring Home.

The Homework Folder accompanies the child to *every* academic class along with their agenda. All homework goes into this folder, notes from teachers, things I need to sign, etc. At home, it is gone through daily. Completed homework and signed papers go into the Left Pocket, and we empty out the Right Pocket. Easy Peasy!

Of course, that's not all they need, which brings me to my next post...

posting to OrgJunkie!

Saturday, September 10, 2011

Laundry Room conversion

I don't really have any "before" pictures for most of my projects. If I do, I'll post them. For this room, I don't.

Our laundry room is very large - approximately 10 foot by 7 foot, the size of a small bedroom. It holds my washer&dryer (HE's on pedestals), a large freezer, my Dyson, steam mop, and a lot of other things as you'll soon see. Too large to fit into one picture, I'll go through an area at a time.


This is the TV stand version of the EXPEDIT line at IKEA. I wanted the 5x5 EXPEDIT unit but it was constantly sold out in white and I became impatient. I'm glad we went with this one now because it's incredibly more versatile. The blue LEKMAN bins are expensive at $10 a pop (the ones seen inside the Expedit cubes) and are a bit fragile. They are working even holding heavy and bulky items, but the construction of them is not top notch. We have to be careful handling them. The bins hold, variously: candles, oils, and Scentsy bars; Lysol wipes; mismatched socks; the kids' karate gis and sparring gear; my upstairs Cleaning Bucket; Air Fresheners; miscellaneous cleaning products; dusting supplies; a Shark handheld vacuum for the stairs (yes that actually fits in one of these cubes...they are 14x14"!); my Shark steam accessories; Dyson accessories; and bathroom cleaning supplies (scrubbers, mildew spray, etc). 

The TROFAST lighter blue containers at the top have various functions. The two left-most ones hold "small rewards" and "large rewards" for the kids. The middle one holds clothes that are outgrown that I pull out of the clean laundry as I come across them (when it gets full, they are moved to a larger storage bin until I can sell or donate them). The last ones hold fabric I've been saving for years with the intention of having historical costumes made - silk velvet, dupioni silk, and other things that I just can't bring myself to let go of yet. Maybe someday! For now, they meet the rules of being Contained and Organized.

The lower shelf with the 2 lighter blue cubes now holds 2 larger blue plastic baskets. During the summer we used these to hold towels in one and swimsuits in the other. During the winter, I'll put those away (where? no clue yet) and one will hold mittens and hats, and the other will still hold towels for when snow or water gets tracked in on the tile floors.

The interior center of the EXPEDIT is neat. There's juuuuust enough room to fold smaller items on it. The vinyl applique I got on Etsy done in my laundry room colors just for a perky uplift to a room that's based around, face it, work and crummy chores. At the top I hung a bar (sorry, don't remember the name) from IKEA that was $2.99, and the little dark and light blue containers were 99c each. I use them for "stuff I find in pockets", lint from the dryer screen, trash, money, clean up towels (have to wipe down the gasket for the washer every once in awhile and clean out the drum). 

Here's the view over the washer&dryer with the ANTONIUS shelving line from IKEA. They hold a LOT of weight and are 24" deep! How awesome is that? The hanging rods are part of the line; here you can see I use them to hold the extra hangers so I can hang up laundry right as it comes out of the dryer. The top shelf is devoted to toilet paper (barely started the stockup in this pick) - it fits about 10 of the huge packs of Charmin across and one of Bounty (we rarely use paper towels, but they are nice to have around sometimes for like, killing bugs *ew*). The blue bags that say "Laundry" came from Lakeside Collection for $5; these hold our spare sheets. The smaller blue boxes (since replaced with slightly larger ones) hold tissues and feminine products. My actual laundry products are in the pedestals under the W&D.


The right side of the same thing (you can barely see the edge of the dryer to the left - to the right is the freezer edge) is where I hang clothing up as soon as it's out of the dryer - no more wrinkles! Also the perfect place to hang-dry items as well as they get some mild heat from the dryer in the room to release the wrinkles as they hang dry. More sheets are in the "Laundry" bin above (we have 6 beds, one of which is a king, and sheets for a queen size aerobed as well).

Below the hanging items are my laundry bins. I've since labeled the edge of each with a Sharpie to read "DARKS" and "LIGHTS". These neat bins from The Container Store are on rollers, so I roll them round to the washer when it's time to load - no lifting required! I am currently searching for an alternative though that will hold 3 across; I actually wash "darks", "lights", and "COLORS" so I'm still having to do after-sorting that I'd rather not. These work great for now though.


And finally, my $5 huge IKEA clear box on rollers. Yes, that thing is so large it covers the entire top of the freezer. That bin holds all of our extra and winter blankets and STILL HAS ROOM IN IT! I hope to move some others from the kids upstairs' linen closet to this soon, but I keep forgetting and those actually get used often.

So, that's my pretty awesome laundry room now! It's functional, it does everything it needs, and I love that it's fairly "decorated"!

Backpack Station version 1.0 vs Charging Station

I loved this, but sadly, it was replaced later with something that fit the needs of the library/office better, and was moved. However it was cool while it lasted, and worked, so here it is for reference sake:
This was taken around Halloween (thus the fall jackets, and the decorations on the top shelf). Everyone's coats hung here, you could sit on the bench to put your shoes on, and the backpacks slid under the bench. 

Problems: It looked really junky with all the coats there sticking out in my main hallway. Nowhere for umbrellas, shoes, or accessories (hats etc). And while the pieces matched each other, they matched nothing else within view of them.

Replacing them is this:

This is a shoe cabinet from IKEA. It's really neat - we have it positioned where the bottom right section is over the wall plug. While here it's got Mardi Gras stuff on it (only good pic I had with the mirror included), it normally hold out cell phones charging on top of it (our Charging Station). The other 3 sections are juuuust wide enough to hold 17" laptops - the two older children's (to get them out for the kitchen table to do homework) and my own if I need to clear off my desk for a project. This is right across the hallway from the library/office and about seven feet away from my desk. I love it. And it's only 4" deep, which doesn't impede the view or function of the hallway. The previous bench was 18" deep.

Much more functional and appropriate for that particular space.