Saturday, October 22, 2011

Week #42 - Closet seasonal swap out

Linking up with OrgJunkie again :)

Today, I switched my daughters' closets over from summer to fall/winter. This involved several changes. They are now in a school with a uniform, so they are not in need of as many clothes; both of them are in the same size now as they were last year; and I wanted to update the storage pieces in their closets as well.


First, we swapped sides so there wasn't as much hanging room. The dressers are now apart from each other on the long side (explanation follows in a few paragraphs).

My first daughter's closet is very large, and needed 7 13" bins to go across one long shelf on the right hand side of her closet. We chose 4 pink bins and 3 black bins (she has a black and pink 6 section hanging organizer to hold her uniforms and make the mornings easier, so we were matching that). We got all of her things packed away for next spring/summer into the new bins, 5 of them instead of the previous 7. We used the remaining two bins to hold her extra backpacks, shoes, and purses.

We purged 1 large bag of trash (stained and ripped clothing, outright trash, tags, broken jewelry, broken purse strap purses, etc). We also purged 4 garbage bags of winter clothing that will be garage sale-d in the next couple of weeks and only kept her favorite winter dresses and comfy play clothing. We also majorly purged down her shoes and got rid of the shoe organizers underneath her hanging clothing; she has 2 pair of dress shoes (black and navy), one pair of school sneakers, one pair of gym sneakers, and 6 pairs of boots that now occupy the same space. 

The final thing we did  was to clear out her drawers to pack away swimsuits, shorts sets, mismatched socks, and outgrown items. She now has a few empty drawers and several minimally filled ones. The dressers in question are placed on either side of the longest wall with no clothes hanging on that wall; for Christmas, DH plans to build her a vanity between the two so that she will have a private space for doing her hair and makeup instead of the bathroom shared by three children in the mornings!

I chose these bins from The Container Store as they are being discontinued (Middle row, for size).


Then I did younger daughter's closet. She is also in the same size this winter as she was last and has uniforms, so we did the same type of purging. We drastically reduced her shoes, however, as she has AFO's now to correct her toe walking/over pronation and most shoes do not fit over the orthotics. I plan to use her now mostly empty shoe organizer on the back of her door to hold socks and tights for quick reference/matching.

Her closet is much smaller, at 39.5" across with 2 usable sides. So she got 6 pink cubes -2 for dresses, 1 for shorts sets, 1 for the rest of her nursery bedding set (I keep having items made to match including a twin quilt most recently), 1 for backpacks and purses and 1 for shoes (in hopes she is out of the AFO's by next spring *crossing fingers* it will have been over a year and many of the shoes are still too big for her natural foot size..). I removed the shelf we had set across the other two to make a "U" shape to hold more when she was an infant, and when I say we purged, I mean we PURGED!
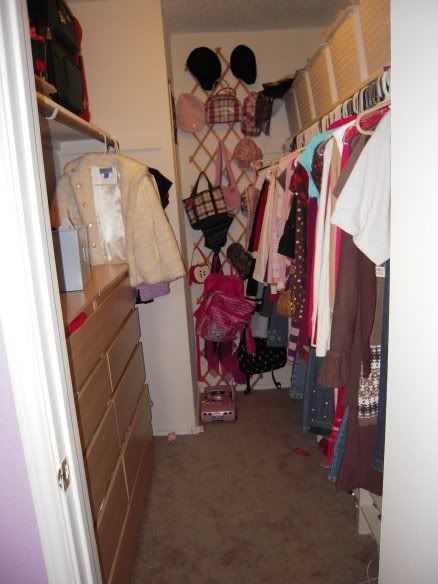
Before:
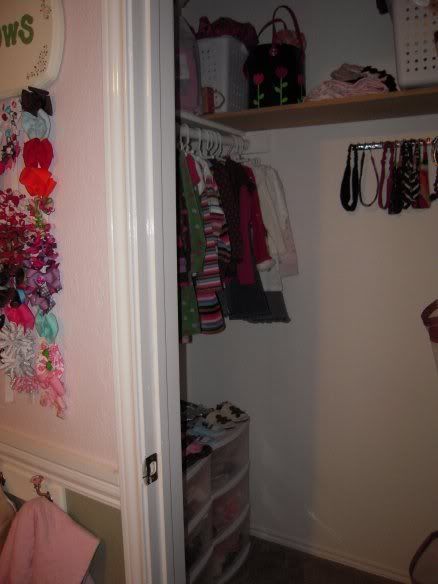
(the other side had TWO rods...)

There were 2 bags of trashed clothing, 2 bags for donation, and 8 bags for selling! Wow! That was from our winter stash and from what we let go of from spring/summer. I think an entire bag was shoes.. I had a bit of an addiction there :X

I need to do my son's closet, but they were all sold out of the blue bins and so I am on the hunt for what I want to use in his closet. He is unlikely to change sizes anytime soon (men's size large for over a year now; previous to that a men's medium/youth xxl for 3 years) so there is not much purging to be done. I actually need to purchase him some sweaters and long sleeve shirts as the ones from last year were too small.

I am actually a recovering kids clothing addict, so this was a HUGE step for me - the first step is that over the past year, I've only bought what I *loved*, and purchased maybe 1/50th of what I had in years past. Yay! All that money saved allowed us to make lots of changes and upgrades to the house and to our activity budget, which was very nice as well. I still have my "bad moments" of giving in and coming home with several shopping bags - but I am no longer reticent about returning 95% and only keeping a couple of things that I love - or not keeping anything at all if we didn't love it.

How do you organize your children's clothing? I base mine on the fact that I now do laundry only twice a week - sheets, playclothes, pajamas and towels on Wednesday, and all uniforms (husband's and children's) on Friday nights. My magic number for any given thing is thus 14 (in case I'm sick or we take a trip and need 2 weeks worth of clothing).


Friday, October 14, 2011

Kitchen Renovation Step Two: The Estimate

Yep, the estimate is in!


Good news - it is well under what I feared it would be, and we're able to include the little extras we wanted (a bookshelf, wine rack, crown moulding, under cabinet lighting, and GRANITE countertops! YAY!)

Bad news - it will be happening sometime between Halloween and Thanksgiving, which is already a very busy time of year for us. We are being told it will take one day for rip out, one to two days to place the new cabinets and fix everything up, and then five days past that for the countertops to be finished. Ugh. I can't wait for it to be done, but that's going to be a tough week with no sink and no prep space except the kitchen table! Peanut butter sandwiches it will be!

I still have to give the final okay to the samples they are making up (we chose oak wood with a maple stain vs a patina stain), and choose the granite. They will be starting on the construction of the cabinets off-site as soon as possible, however.

I must also choose what sink I want (undermount, single bowl stainless..but have to pick which exact model); water fixture; and the new stainless microwave (since they'll be taking the old one down, it will be the best time to put the new one up so they can frame it in if needed).

I am SO excited! We're going to refinish an inherited kitchen table that fits our space much better (has 2 leaves vs 1) to match the cabinets as close as possible (it's a maple wood, so the stain will look a little different). If possible I may ask them to do this to both save our time and because our level of expertise is nill next to theirs.

Will update with Step Three: Final Decisions when the verdict is in!

Second Stage of Kitchen Renovation: Pantry

Linking up to OrgJunkie as usual, this was our project this week (and it's COMPLETE!)

The Container Store has been having a 25% off sale on their ELFA systems for some time (and hurry if you want to buy; it ends this Sunday, October 16th. Drawers for the system will be going on sale starting 12/24 so hold out on those! *wink*)

I apologize for the quality of my pictures, and lack of before pictures - my camera battery again wasn't charged (need to invest in a 2nd battery) so I just used my ubercrappy 3G no-flash iPhone to snap a couple of shots.

We have a pantry that is reach in only. There are bifold doors which open, and the interior measurements were 55" across and 22" deep. I know that is larger than many pantries some families have access to, but since I cannot use the back sides of the doors (and can't go to different than bifold without running into the kitchen table) this presented some unique challenges for us and made it the smallest pantry we've ever had, including in our first college apartment.

We did the platinum finish (to eventually match our stainless steel appliances), and painted the interior of the pantry to match the kitchen (kind of a cafe au lait color). For a little under $300, we got 4 supports (one spaced oddly, and extra, but will allow us to add drawers later if we wish), one 12" deep shelf, and four 16" deep shelves as well as the brackets and other items required for installation.

On the very top shelf we had to go narrow as it's above the door opening and we must reach above and around the second-to-top shelf to reach it. I chose to use containers that had handles on them so I can easily pull them down when I need them.

They were around $4 at Walmart when I first got them years ago. I freshly washed each of them and gave them all new, extra large font labels (sorry, blurry in the pic but not IRL). These hold castor sugar, brown sugar, granulated sugar, coffee creamer, pancake mix, steel oats, dried fruit (to add to oatmeal), and flour. To the right of these canisters are containers with built in handles; a large gallon of vegetable oil, a large container of soy sauce, and a large container of syrup.

The second shelf down holds steel mesh bins but will be changing the contents of these bins into some matching mesh DVD holders that the Container Store also has on sale (they are large enough to hold tuna packets, kraft dinner boxes, and other things using the space more wisely). Then I will be using these bins to hold taller, lighter objects such as chips and also heavier items that need to breathe like root vegetables.

Here is the best picture I could get of the entire pantry assembled:

Next shelf down holds 3 larger style containers, same as the top ones, in which we hold cereal and granola (I'm a coupon shopper, and each of these babies holds about 6 boxes of Cheerios!). The Bread Box is next to that and while I don't have any right now, I'll be adding a basket on top of it to hold bread mixes. The empty space next to it will be holding the stackable mesh DVD holders I mentioned above for boxed dinner mixes.

Then follow the cans. I was actually really upset that I had to reuse my "ugly" white extra wide can holders, as I wanted to match the stainless look. All of the metal ones available are not wide enough for cans, only for spices. Darn you, Container Store! That's okay, as you can see at the bottom, my bulk bins are also white. My lovely husband has it in mind to experiment with the Krylon for plastic spray paint in a silver or grey finish on these white objects ;) The surfaces won't come in direct contact with food, the bulks are individuals like Capri Suns, dried fruit packets, applesauce containers, etc. I'm still considering if we will "go that far" or just deal with the white.

The second to last shelf - you can't see all the way to the right hand side of the pantry - holds 5 packs of bottled water where previously my 12" deep shelf could only hold 3. That's almost doubling my space right there! Yay!

If we do decide to add a couple of drawers, we will move up the canned shelf a few notches and do it under that shelf, above the water.

I'm so happy with how this turned out. The "old" pantry had a lot of wasted space, lots of badly used organizers (like the baskets that "hook" onto the shelves and then leave a not stable thing on top of the shelf you can't set anything on), irregular shaped baskets and general bleh. The walls were badly stained and so were the bowing particle board shelves from the previous occupants. We have been "fighting" this pantry for over five years... and enough was enough! Who knew we could knock it out in one day? :)

We need to wait for our next paycheck, but we also plan to replace the louvered doors with solid six paneled types that match our interior and exterior doors. I don't know why these were ever put on there, and they are impossible to keep clean and several of the "sticks" have been chipped over the years due to catching on things and people.

Saturday, October 8, 2011

A long journey of transformation for DD1's room

They grow up so quickly, don't they? *sigh* (PS..does anyone know how to put photos next to each other so they are not all stacked? This is driving me nuts.) Linking to OrgJunkie as this project was my 38th and 39th weeks in the 52 weeks of Organization challenge - week 38 was repainting above her chair rail; week 39 was rearranging her furniture and changing some accessories out.

We moved into this house about six years ago. In that time, we've had her original room setup (where we had just moved in), her initial redo a year later for furniture that fit the room and held her things properly, and then this past year we redid things as an 11 year old wants things far different than a 7 year old does.

From move in until right before the first change:


Everything had a place, but it was driving me nuts. None of the furniture matched as it was gathered as cheaply as possible (we had a very small budget at that point); there were 2 sets of name letters as she couldn't decide if she wanted to go with lighter or darker colors (see the 2 shades of curtains as well), and everything had a place but was visually very messy and crowded.

Thanks to the RoomArranger offered by Better Homes and Gardens, and a sale at Penney's on some Pottery Barn Kids - type modular furniture, we decided on this arrangement:

Her bed would change to a daybed with trundle so we didn't have to put the headboard on one wall; she'd gain two nightstands; a large television unit, and a desk with more storage. The table would go in front of the window and move out of the corner. This arrangement worked for a long time. The new room looked like this:


We changed the curtains (Lowe's), added the canopy and door entrance (Hearthsong..already owned the canopy but it kept getting pulled out of the ceiling on the previous bed because she'd roll over on it; the daybed prevented that from happening again!). We went off the green chair covers to her accent color and kept Tinkerbell's bedding for the bottom trundle bed. I covered the pink bins she had on the shelves with pretty Contact Paper for the cubbies, and used the 2 purple ones by her desk. We had cohesion! We had storage! We had prettiness! yay!

And the years went by and she grew older, and her needs changed some more. We decided on a new arrangement of her modular furniture and ditched the table entirely. We made better use of the longer wall in her room, let go of the nightstands (which had become hot spots for junk collection - TOO MANY little drawers), got her a comfy chair to read in, and left the space at the window open for some floor pillows and I'll be getting a big purple rug for the middle of the room for her and her friends to lounge on. This room should now take her through the teen years (I hope!). Please ignore my chop-job on the curtains, I still have to level them out at the window-sill level (had to cut them down from 80" lengths and did a horrible job mis-measuring).


We have not yet decided if the TV is staying since she mostly watches on her laptop, and we have a media room just outside her bedroom that she can watch TV with her friends on. It is potentially going to leave (along with the extra piece of modular stacker) and be replaced with a second fuzzy chair. To give a sense of scale, the dollhouse pictured is over 3 feet high; we had to remove the lower shelf in the spanner to make room for it.

Stuffed animals are still the bane of my existance, but we haven't found a better way of storing them except on top of the desk. She'll be needing this space in the next few years for trophies and things from school events and sports (she's already gotten her gold belt in karate and is nearly to the next level) so I'm not sure where the animals will end up (possibly on the window seat?). We've already gotten rid of over half of them. She also lacks the proper space for storing her books, but we're making do as best as we can with that for now. I may go to baskets for her desk and then organize the books within them by genre or series and that way we can use the full depth of the shelves as well to store more. 

So it was a long and expensive journey, but I think we did well with it! Everything was done for under $1500 including all the furniture, bedding changes, paint, etc. The last re-set only ran about $200 for paint and supplies, bedding, and the blue chair and a few accessories. Yay for clearance!